Site notice
Welcome! Please check To-Do List to see what pages need help, who is working on what, etc.
  • Please do not copy any articles, templates, files, etc. from other wikis.
  • Please include a source when uploading a file.

Mega Man Maverick Hunter X

From Mega Man Wiki
Game Info
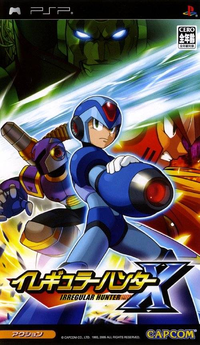
Box Art
General information
Game Title(s):Mega Man Maverick Hunter X, Maverick Hunter X, Irregular Hunter X
Developer(s):Capcom
Publisher(s):Capcom
Release Date(s):
JP: December 15, 2005
NA: January 31, 2006
EU: March 3, 2006
Genre(s):Action, Platformer
Game mode(s):Single Player
Platform(s):PlayStation Portable

Mega Man Maverick Hunter X (イレギュラーハンターX, lit. "Irregular Hunter X") is a remake of the first Mega Man X game, developed by Capcom and released for the PlayStation Portable in 2005-2006. The game is also cross-playable on the PlayStation Vita via PSN Download.

This remake features gameplay and story largely similar to the original Mega Man X, though with major script differences, extensive character redesigns, and redone graphics and soundtrack. It also features a new mode where the player controls Vile instead of X, and a short animated movie called "The Day of Sigma" that serves as a prologue to the game's story.

Story

The year is 21XX. Humans live in peace alongside mass-produced, highly-intelligent robots called Reploids. However, no technology available has been able to completely eliminate the danger that comes with robots running on artificial intelligence. As a result, malfunctions have started occurring, leading Reploids to start attacking humans. These Reploids, having exceeded the bounds of their protocols, are called Mavericks. In order to round them up and protect humans from the Maverick threat, the Maverick Hunters were formed.

Among the Maverick Hunters, one Reploid in particular stood out from the crowd as the most advanced Hunter of them all. His name is Sigma. "Reploids of the world! Take up arms and unite! Now is the time for revolution!" Out of the blue, this was Sigma’s call to arms, igniting a rebellion across the globe. Now X, another Maverick Hunter from the same team as Sigma, along with his best friend Zero, set out to put down the rebellion and put a stop to Sigma. Who knows what fate holds for these two...[1]

Characters

Name Image Description
X A Reploid in Unit 17 of the Maverick Hunters. Who made him? What is his purpose? These questions are shrouded in mystery. Despite going up against Mavericks, his gentle side tends to make him hesitate at times while destroying his opponents. This has held him back at a B Hunter Rank (other Hunters view his kindness as weakness). Zero and Sigma are the only ones who sense X’s true potential.[1]
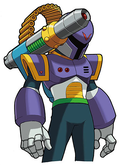
Vile A Reploid formerly of Unit 17. With an irregularity in his central processing core, he will stop at nothing to destroy Mavericks, no matter the cost. He seems to enjoy his mission of hunting down Mavericks with a crazed obsession, and is considered to be borderline Maverick. Lately his superiors had incarcerated him on suspicion of actually being a Maverick, but he managed to escape under the fog of the rebellion.[1]
Zero(Which one?) A Reploid in Unit 17, the same as X. One of the few who senses X's true potential. Zero completes his missions with speed and precision, and is second only to Sigma as an SA Rank Hunter. People find it strange that Zero worries so much about X, a B Rank Hunter. As for X, who doesn’t seem to get along with other Hunters, Zero is the only one he truly respects and can confide in.[1]
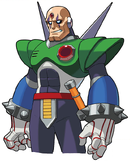
Sigma Created by Dr. Cain, inventor of the Reploids, Sigma is the ultimate Reploid, with higher intelligence and battle capabilities than any other Reploid. Formerly headed the Unit 17 that X, Zero and Vile belong to. Always calm, cool and collected, playing the perfect leader off the battlefield, and the perfect war machine on the battlefield. However, one day he suddenly became a Maverick on his own and started a rebellion against all humans. Why would he do such a thing? What truth lies beneath the surface...?[1]
Navigator A mass-produced navigator Reploid employed by the Maverick Hunters. She relays important information to X at crucial moments, and also appeared in the animation "The Day of Sigma."
Dr. Light The original creator of X. He only appeared in-person during flashbacks in "The Day of Sigma," but a hologram replica of himself dwells within the Light Capsules to posthumously bestow Armor Parts to X.
Dr. Cain The human scientist who unearthed X and created the Reploids, including Sigma. He only appears in the "The Day of Sigma."

Enemies

Minor Enemies

Name Sprite Description HP Damage Stage(s)
Amenhopper File:MHX - Amenhopper Render.png A water insect that jumps and glides across water surfaces or hops around on land. It sometimes drops a small bomb. 2 2 (contact)
1 (bombs)
Subterranean Base (X mode), Recon Base Ruins
Armor Soldier File:MHX - Armor Soldier Render.png A robot that pilots a Ride Armor and uses it to punch, dash and jump at X. If X has no Ride Armor himself, the enemy will spawn outside of its Armor before jumping in, giving him time to destroy it and take its Armor. If X takes the Armor without destroying the Soldier, it will shoot at him. 16 (Armor)
3 (Soldier)
Armor:
1 (contact)
3 (punch)
Soldier:
2 (contact)
1 (projectile)
Abandoned Missile Base, Recon Base Ruins, Sigma Palace 2
Axe Max File:MHX - Axe Max Render.png A robotic lumberjack that uses its axe to knock segments of the pillar in front of it at X. The segments can be stood on or destroyed, but they regrow immediately while the Axe Max is not attacking, blocking a clear shot on it. If it scores a hit, it will laugh and stop attacking for a short time. 8 (Axe Max)
3 (segment)
3 (Axe Max)
2 (segment)
Abandoned Missile Base (X Mode), Recon Base Ruins
Ball De Voux File:MHX - Ball De Voux Render.png A robot with a spherical body that walks back and forth on its and long, bendy legs. Only its main body can be harmed. 2 1 Abandoned Missile Base (Vile Mode), New-type Airport (X mode), Electromagnetic Power Plant, Central Highway, Sigma Palace 2 (X mode)
Batton Bone File:MHX - Batton Bone Render.png A bat robot like Batton that starts out on the ceiling and starts following X around if he comes close. If it touches him or he moves too far, it stops following and flies back up to the ceiling. 1 1 Abandoned Missile Base, Energy Mine Ruins, Sigma Palace 2, Sigma Palace 3
Batton M-501 File:MHX - Batton M-501 Render.png A hidden "easter egg" enemy that is identical to Batton Bone in all but appearance. All items it drops are guaranteed to be 1 UPs. 1 1 Energy Mine Ruins, Recon Base Ruins (Vile mode)
Bomb Been File:MHX - Bomb Been Render.png A bee robot that drops mines, which explode after a delay. 2 2 (contact)
1 (mines)
Central Highway, Abandoned Missile Base (X mode), Recon Base Ruins (Vile mode), Central Highway (X mode)
Crag Man File:MHX - Crag Man Render.png These robots are found inside large boulders that drop from the ceiling, being completely invincible until they have fully broken out. They toss rocks while standing in place. 8 2 Energy Mine Ruins (Vile Mode), Recon Base Ruins (X mode),
Creeper File:MHX - Creeper Render.png A spiky caterpillar whose small size makes it hard to hit. They are mainly thrown by Mad Peckers, but will also emerge from holes in the walls in Sigma Palace 4, where they crawl down the wall a short distance before dropping. 2 1 Recon Base Ruins, Sigma Palace 4
Crusher File:MHX - Crusher Render.png Flying robots that often appear in groups. They patrol a small area, stopping to drop their spiky weight, which destroys a part of the floor before being retracted again. If its body is destroyed first, the weight will still fall. 2 (Crusher)
2 (weight)
4 Central Highway
Dig Labour File:MHX - Dig Labour Render.png Pickman-like robots that stand in place and throw their picks at X in an arc. 4 3 (contact)
2 (pickaxe)
Energy Mine Ruins, Prototype Weapons Plant , Recon Base Ruins (Vile mode), Central Highway (Vile mode), Sigma Palace 1 (Vile mode), Sigma Palace 2, Sigma Palace 3 (X mode)
Dodge Blaster File:MHX - Dodge Blaster Render.png A wall-mounted gun that slides up or down towards X to charge up a slow-moving shot and fire it straight forward, but attempts to quickly slide away if not already charging when X returns fire. 3 2 Abandoned Missile Base (Vile mode), Fortress Tower, Electromagnetic Power Plant (Vile mode), Sigma Palace 1, Sigma Palace 2, Sigma Palace 3 (Vile mode)
Dripping liquid File:MHX - Dripping liquid Render.png Red liquid (possibly lava) that drips from pipes at set intervals and harms X on touch. N/A 2 Prototype Weapons Plant
Flame pillar File:MHX - Flame pillar Render.png A pillar of fire that shoots up from the lava in the Prototype Weapons Plant and destroys the floor section it goes through. If Chill Penguin has been defeated, it will not be there. N/A 2 Prototype Weapons Plant
Flamer File:MHX - Flamer Render.png A flamethrower turret that creates a beam of fire with a set length in front of it. It is only found on moving platforms. 6 3 (contact)
2 (flames)
Abandoned Missile Base (Vile mode), New-type Airport, Fortress Tower (Vile mode), Sigma Palace 1, Sigma Palace 3 (X mode)
Flammingle File:MHX - Flammingle Render.png A tall, stationary bird robot that spins its body around to throw the sawblade crest on its head at X. 8 3 (contact)
2 (sawblade)
Abandoned Missile Base, Energy Mine Ruins, Electromagnetic Power Plant (X mode), Sigma Palace 2
Gulpfer File:MHX - Gulpfer Render.png A fish that attempts to suck in and swallow X. X will take 2 damage every few seconds if he remains trapped for too long, but can break free and destroy the enemy from the inside by rapidly jumping or shooting. 10 2 Subterranean Base, Sigma Palace 1, Sigma Palace 3
Gun Volt File:MHX - Gun Volt Render.png A stationary robot that either fires two rockets straight ahead or releases sparks that travel along the floor. 16 3 (contact)
2 (projectiles)
New-type Airport, Electromagnetic Power Plant, Central Highway (X mode), Sigma Palace 1, Sigma Palace 2 (X mode), Sigma Palace 3 (Vile mode)
Hoganmer File:MHX - Hoganmer Render.png A stationary enemy that throws its ball & chain at X when he come close. It carries a shield that blocks X's shots when not attacking, and the spiked ball will likewise deflect them, making the enemy difficult to damage. 8 3 (contact)
2 (spike ball)

Prototype Weapons Plant, New-type Airport, Fortress Tower, Recon Base Ruins, Sigma Palace 1 (X mode), Sigma Palace 3 (Vile mode)

Hotarion File:MHX - Hotarion Render.png A fast-moving firefly found in dark rooms. It soars in a straight line and pulls a beam of light across the screen, which briefly illuminates part of the room. 1 2 Electromagnetic Power Plant, Sigma Palace 2
Jamminger File:MHX - Jamminger Render.png A flying robot that flies in quickly, stops, and slowly moves towards X's last position before flying off the top of the screen if it cannot get to him. If it can touch him, it repeats its movement. 2 1 Abandoned Missile Base, Energy Mine Ruins (Vile Mode), Fortress Tower, Recon Base Ruins (X mode),

Central Highway (X mode), Sigma Palace 1, Sigma Palace 2, Sigma Palace 3

Ladder Yadder File:MHX - Ladder Yadder Render.png A lizard-like robot that crawls a small distance up and down ladders, briefly stopping at the ends of its path. 3 2 Fortress Tower, Electromagnetic Power Plant (Vile mode)
Lift Cannon File:MHX - Lift Cannon Render.png A Turn Cannon atop a pillar that rises from the ground, lowering itself again with every shot. 2 3 (contact)
2 (projectiles)
New-type Airport
Mad Pecker File:MHX - Mad Pecker Render.png A woodpecker that clings to and pecks at trees, occasionally pulling out and tossing a caterpillar-like Creeper enemy. 6 2 Recon Base Ruins
Mega Tortois File:MHX - Mega Tortois Render.png A large and very durable tortoise robot that fires bombs from its back, which fall down on parachutes and can be destroyed. 16 (Mega Tortois)
3 (bombs)
4 (contact)
3 (bombs)
Subterranean Base, Fortress Tower, Electromagnetic Power Plant (X mode), Central Highway (Vile mode), Sigma Palace 1, Sigma Palace 3 (X mode)
Metal Wing File:MHX - Metal Wing Render.png A bird that flies towards the cave exit during the last minecart section of the Gallery Stage. It flies away from X, making it mostly harmless, but it can be shot down. 1 3 Energy Mine Ruins
Metall C-15 File:MHX - Metall C-15 Render.png A Metall that hides under its helmet, popping up occasionally to spit a projectile at X when he is close or run towards him when his back is turned. While under its helmet, it is invincible. 2 2 (contact)
1 (projectile)
Energy Mine Ruins, Energy Mine Ruins, Prototype Weapons Plant, New-type Airport (X mode), Metall C-15 (Vile mode), Sigma Palace 1 (X mode), Sigma Palace 3
Planty / Iworm File:MHX - Planty Render.png A Metall disguised as a bush, which pops up and throws out many Iworm enemies that crawl around. 2 (Planty)
1 (Iworm)
3 (Planty)
1 (Iworm)
Recon Base Ruins
Ray Bit File:MHX - Ray Bit Render.png A robo-rabbit that hops around and occasionally fires a laser from its ears. 2 4 (contact)
2 (laser)
Abandoned Missile Base (X mode)
Ray Trap File:MHX - Ray Trap Render.png An invincible, floating drone that shoots fast-moving laser projectiles at X if he trips any of the red beams near it, which flash in and out. It acts like a solid block to X and his shots bounce off. N/A 2 (laser) Fortress Tower (X mode), Sigma Palace 1, Sigma Palace 3
Road Attacker File:MHX - Road Attacker Render.png A robot in a car that drives and shoots at X. X can stand on the car like a platform after the driver is destroyed, which keeps going in the same direction and may still harm him, or he can shoot it further to disable it fully and then destroy it as well. 5 (Rider)
4 (car, moving)
3 (car, broken down)
2 (contact)
1 (laser)
Central Highway
Rolling Gabyoall File:MHX - Rolling Gabyoall Render.png A mostly invincible guard robot that moves along pipes, occasionally flipping from the top to the bottom of the pipe. The Rolling Shield can destroy it. N/A or 1 3 Prototype Weapons Plant
Rush Roader File:MHX - Rush Roader Render.png A Roader-like enemy with a single wheel that drives back and forth and attempts to ram X, but will attempt to stay on its platform. Dealing more than one point of damage to it at once makes it go haywire and quickly spin in place. 6 2 New-type Airport (Vile Mode), Electromagnetic Power Plant, Central Highway (Vile mode), Sigma Palace 1 (X mode), Sigma Palace 2 (Vile mode), Sigma Palace 3
Scrap Robo File:MHX - Scrap Robo Render.png The upper half of a robot that drops from factory chutes and shoots lasers from its eye. It cannot move by itself, but is moved by conveyor belts. 4 3 (contact)
2 (laser)
Prototype Weapons Plant, Sigma Palace 3
Scrapped Utuboros File:MHX - Scrapped Utuboros Render.png The scrapped head of a Utuboros that drops from factory chutes and can only harm X if it falls on it. They can be stood on like platforms and are moved by conveyor belts 6 3 Prototype Weapons Plant
Sea Attacker File:MHX - Sea Attacker Render.png Seahorses that emerge from the ground in groups of two or three and start spinning in place. They quickly launch themselves forward, then down. 2 2 Subterranean Base, Sigma Palace 1
Sine Faller File:MHX - Sine Faller Render.png Robots that slowly float down from the top of the screen, swaying left and right and trying to land on X as they do so. 1 2 Fortress Tower, Sigma Palace 1, Sigma Palace 3
Sky Claw File:MHX - Sky Claw Render.png A flying drone that attempts to snatch up X, eventually self-destructing and dropping him. He can free himself by mashing buttons or firing a charge shot, the latter of which also destroys the enemy. 2 2 (contact)
3 (explosion)
Subterranean Base, Prototype Weapons Plant, New-type Airport, Sigma Palace 1 (Vile mode), Sigma Palace 3 (X mode)
Slide Cannon File:MHX - Slide Cannon Render.png A turret on a platform that slides in and out of a wall, firing a single shot straight forward each time. The platform can be stood on and remains after the turret is destroyed. 3 2 Fortress Tower
Snow Shooter File:MHX - Snow Shooter Render.png A contraption that announces itself with one or two large, rolling snowballs, which can be destroyed and grow as they roll. It then proceeds to throw smaller snowballs at X (the first one encountered throws only one snowball). 4 (Snow Shooter)
3 (large snowball)
3 (contact)
2 (any snowball)
Abandoned Missile Base
Spark File:MHX - Spark Render.png A spark of electricity that travels through the glass pipe floor in the Electromagnetic Power Plant, harming X on touch. If Storm Eagle has been defeated, it will not be there. N/A 2 Electromagnetic Power Plant,
Spiky File:MHX - Spiky Render.png A spiked wheel that rolls in one direction. It falls over and slides when on its last point of health, before self-destructing. 3 2

Abandoned Missile Base, Energy Mine Ruins, Central Highway, Sigma Palace 1 (Vile mode), Sigma Palace 3

Tombot File:MHX - Tombot Render.png Small, flying robots that start on the ground or are released by igloo-like structures. They jet up quickly, then drop their propulsion rockets and slowly follow X. 1 2 Abandoned Missile Base, Recon Base Ruins (Vile mode)
Turn Cannon File:MHX - Turn Cannon Render.png A cannon that turns between shots to alternatively shoot at diagonals or left and right. It is often found on moving platforms and can also appear on the ceiling, or standing atop a growing pillar as a Lift Cannon. 5 3 (contact)
2 (projectiles)

Energy Mine Ruins (Energy Mine Ruins), New-type Airport, Fortress Tower, Electromagnetic Power Plant, Sigma Palace 1 (Vile mode), Sigma Palace 2, Sigma Palace 3


Mid-bosses

These are powerful and unique enemies, but do not have Life Energy meters.

Name Sprite Description HP Damage Stage(s)
Anglerge File:MHX - Anglerge Render.png A submarine that sits on the ocean floor and releases four eels, which quickly wriggle away while making 90° turns. It can also suck X towards it or blow him away. If X is not in front of it, it will release no eels and activate its search light, which can be destroyed separately (though it does nothing). 32 (Anglerge)
(searchlight)
2 (eels)
4 (contact)
2 (eels)
Subterranean Base, Sigma Palace 1
Bee Blader File:MHX - Bee Blader Render.png A large, bee-like robot that hovers above the ground, shooting machine gun fire diagonally downward and releasing Ball De Voux or homing missiles. It moves closer to X every time it is hit and causes the floor to collapse after it is destroyed. 32 4 (contact)
2 (rockets)
1 (gunfire)
Central Highway
Cruiziler File:MHX - Cruiziler Render.png A whale-like battleship that drops or flings depth charges and releases Sky Claws. X can stand on top and must attack the blue crystal on its back to damage it. Once destroyed, it will break through the floor below, opening up another path. 64 3 (charges) Subterranean Base
Death Rogumer File:MHX - Death Rogumer.png A massive carrier ship that is encountered twice, each time directly before the boss of the stage. In the Central Highway, it cannot be damaged and simply drops Road Attackers for X to destroy before eventually lowering Vile in his Ride Armor.

In the New-type Airport, X must board the ship, which attacks with two destructible turrets shooting straight forward. After getting inside, most of the Rogumer explodes, luring out Storm Eagle. Once this boss is defeated, the ship crashes and cannot be encountered in the stage again.

7 (turrets) 3 (turret contact)
2 (projectiles)
New-type Airport (X mode), Central Highway
Mole Borer File:MHX - Mole Borer Render.png A large mining machine that moves relentlessly forward, destroying the walls in front of it. X can destroy it, but loses a life instantly if he touches it. 60 30 Energy Mine Ruins, Sigma Palace 2
RT-55J File:MHX - RT-55J Render.png A powerful robot that guard a Dr. Light Capsule. It makes large jumps and attempts to catch X with its extendable claws, either harming him directly or grabbing and slamming him into a wall. It can also pull itself towards a wall this way. The claws block shots while not extended. 64 2 Recon Base Ruins
Thunder Slimer File:MHX - Thunder Slimer Render.png A miniboss that bounces between the floor and ceiling, regularly spreading four slime drops that X can get stuck in. He can wiggle free by rapidly moving. If Storm Eagle has not yet been defeated, the miniboss periodically zaps the ground with lightning; otherwise, it can only damage X by colliding with him. 46 5 (contact)
4 (lightning)
Electromagnetic Power Plant
Utuboros File:MHX - Utuboros Render.png A giant worm that emerges from the ground, twists a few times and eventually burrows into the ground again. Only its head and tail end can hurt X, but they are also the only vulnerable parts, with the rest blocking his shots. 72 4 Subterranean Base

Eight Mavericks

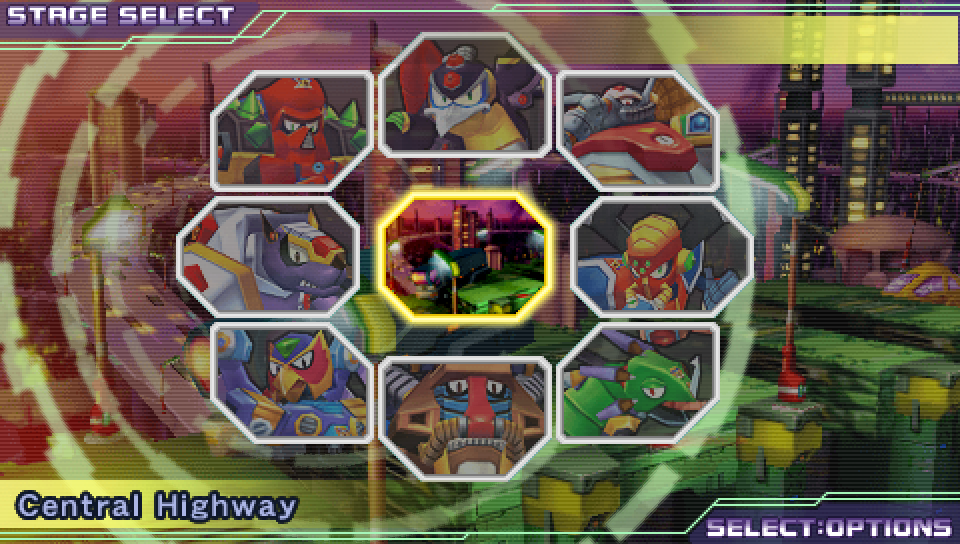
These eight Mavericks appear on the Stage Select screen. They must be defeated to open the Last Stages.


Name Sprite Description Stage Weapon Weakness
Launch Octopus Subterranean Base, Sigma Palace 1 Homing Torpedo Rolling Shield
Chill Penguin A penguin who can slide or jump at X, spit bullet-deflecting ice blocks, or create two ice sculptures and move them by summoning a snowstorm as he hangs from a hook on the ceiling. His sculptures block shots, even his own, but can be destroyed with a charged buster shot. Abandoned Missile Base, Sigma Palace 3 Shotgun Ice Fire Wave
Armored Armadillo Energy Mine Ruins, Sigma Palace 2 Rolling Shield Electric Spark
Flame Mammoth Prototype Weapons Plant, Sigma Palace 3 Fire Wave Storm Tornado
Storm Eagle New-type Airport, Sigma Palace 2


Storm Tornado Chameleon Sting
Spark Mandrill Electromagnetic Power Plant, Sigma Palace 2 Electric Spark Shotgun Ice
Sting Chameleon Recon Base Ruins, Sigma Palace 3 Chameleon Sting Boomerang Cutter

Other Bosses

These assorted bosses appear in the game's Opening Stage and Last Stages.


Name Sprite Description Stage Weakness
Vile File:MHX - Vile (Ride Armor) Render.png Vile's Ride Armor renders him invincible to X's attacks, making him an unbeatable boss who punches and dashes at X to lower his energy. Once X is paralysed by one of his shots, Zero rescues X by damaging Vile's Ride Armor and forcing him to retreat. Central Highway, Sigma Palace 3 (X mode) N/A
Vile File:MHX - Vile Render.png Vile starts in Ride Armor, again rendering him invincible until he paralyses X. Zero then destroys the Ride Armor, forcing Vile to fight X on foot. Vile dashes and makes giant leaps across the room, firing paralysing shots while on the ground or dropping bombs while in the air, the latter of which split into two blasts along the ground. He takes increased damage from all of X's Special Weapons, though Rolling Shield is particularly harmful. Sigma Stage 1 Rolling Shield
Bospider File:MHX - Bospider Render.png Sigma Palace 1 X-Buster
Shotgun Ice
Rangda Bangda File:MHX - Rangda Bangda Render.png Sigma Palace 2 Chameleon Sting
D-Rex File:MHX - D-Rex Render.png Sigma Palace 3 (X mode) Boomerang Cutter
Velguarder File:MHX - Velguarder Render.png Sigma Palace 4 Shotgun Ice
Sigma File:MHX - Sigma (battle) Render.png Sigma Palace 4 Electric Spark
Wolf Sigma File:MHX - Wolf Sigma Render.png Sigma Palace 4 Rolling Shield

Weapons

X Weapons

Like in Mega Man X, X wields the X-Buster by default and can equip Special Weapons(Which one?) from defeated Mavericks. However, many of the Special Weapons have been adjusted slightly, especially their Charge Shot versions. The secret Hadouken attack also returns.

Name Icon Description Source
X-Buster
X's default weapon. It fires up to three shots horizontally, and can be charged up for a Charge Shot of two levels. Collecting the Arm Parts unlocks a third Charge Shot level, which varies if gained from the Light Capsule or from Zero. Default
Homing Torpedo
Fires a torpedo which changes trajectory to home in on enemies.
Charge Shot fires four piranha-shaped torpedoes simultaneously.
Launch Octopus
Chameleon Sting
Fires three lasers at different angles, which can be angled up or down.
Charge Shot makes X flash colors, giving him temporary invincibility while allowing attacks.
Sting Chameleon
Rolling Shield
Fires a rolling shot that bounces off of walls.
Charge Shot summons a barrier around X that defends him from most enemy attacks while allowing attacks.
Armored Armadillo
Fire Wave
Fires a short-range flamethrower as long as the button is held. Doesn't work underwater.
Charge Shot drops a fireball that bursts into a moving wave of fire on the ground.
Flame Mammoth
Storm Tornado
Fires a horizontal tornado that pierces through enemies.
Charge Shot drops a spark that creates a vertical tornado.
Storm Eagle
Electric Spark
Fires an electric shot which splits vertically on contact.
Charge Shot shocks the entire screen in an electric blast.
Spark Mandrill
Boomerang Cutter
Fires a boomerang that curves upwards before returning to X. Collecting it refills Weapon Energy.
Charge Shot fires four giant boomerangs that fly around X before disappearing.
Boomerang Kuwanger
Shotgun Ice
Fires an ice shot that shatters backwards into four fragments on contact.
Charge Shot creates an ice sled that slides forwards until contact.
Chill Penguin
Hadouken By inputting the Hadouken command from Street Fighter (quarter-circle right FIRE), X throws a powerful fireball that can defeat all enemies and bosses in one hit. Secret Light Capsule

Vile Weapons

Vile has his own unique arsenal, divided into three categories: Shoulder, Arm, and Leg weapons. They are then further divided into three weapons types each, which are unlocked by defeating Maverick bosses. Each weapon also has a cost, and Vile's capacity increases with every boss defeated. Vile also has two armor power-ups that he also gains by defeating bosses, but are not actually weapons.

Name Icon Description Cost Type Source
Cherry Blast
With a range of approximately 25 feet, this vulcan is easy to use. 2 Vulcan Default
Zip Zapper
Though boasting extreme accuracy, this vulcan lacks extensive range. 8 Armored Armadillo
Buckshot Dance
The scattering power of this vulcan results in less than perfect aiming. 12 Sting Chameleon
Distance Needler
This vulcan has good range and speed, but cannot fire rapidly. 6 Chill Penguin
Triple 7
Boasting both power and spread, this vulcan consumes much power. 16 Flame Mammoth
Humerus Crush
Missiles offer more power than vulcans, but consume more energy. 4 Missile Launch Octopus
Popcorn Demon
This missile splits into 3 and can cause great damage. 6 Sting Chameleon
Banzai Beetle
A set of wings allows this missile to glide, contacting many enemies. 6 Storm Eagle
Lost Lamb
This missile travels at an odd angle but can be very useful. 6 Boomerang Kuwanger
Serotinal Bullet
This missile is extremely slow, but can be set as a trap. 4 Chill Penguin
Go-Getter Right
A rocket punch sends your fist flying to teach enemies a lesson. 6 Rocket Punch Spark Mandrill
Spoiled Brat
Though lacking in power, this rocket punch offers intense speed. 6 Launch Octopus
Egoistic Pill
This punch can pierce enemies and objects, but can be stubborn. 12 Armored Armadillo
Golden Right
Though suffering from a short range, this weapon is among the strongest. 20 Flame Mammoth
Infinity Gig
Advanced homing technology can be difficult to get a handle on. 16 Chill Penguin
Front Runner
This cannon not only offers power, but can be aimed up and down. 2 Cannon Default
Trident Line
This weapon fires 3 rounds, but leaves you open for a moment. 6 Sting Chameleon
Fatboy
The most powerful cannon around, it consumes a lot of energy. 10 Boomerang Kuwanger
Fire Murrain
This weapon spreads explosions on contact, damaging lots of enemies. 8 Flame Mammoth
Longshot Gizmo
This cannon fires 5 shots at once, but leaves you open to attack. 14 Storm Eagle
Cerberus Phantom
Not as powerful as other weapons, this laser fires in 3 directions. 6 Laser Sting Chameleon
Nervous Ghost
This laser can be aimed with the up and down directional buttons. 8 Spark Mandrill
Rising Specter
It cannot be aimed, but its wide shape covers a large area. 18 Flame Mammoth
Straight Nightmare
Though slow, this laser can burn through multiple enemies in a row. 14 Storm Eagle
Necro Burst
Use up all your energy at once to unleash a powerful energy burst. 28 Launch Octopus
Metal Crescent
Use the directional buttons to aim this weapon that fires 3 cutters. 4 Cutter Boomerang Kuwanger
Quick Homesick
This cutter travels in an arc like a boomerang. Use it to pick up items! 4 Spark Mandrill
Parasite Sword
Fires cutters that grow as they fly and can pierce enemies. 6 Chill Penguin
Two Headed Slash
This specialized weapon unleashes 2 cutters at once. 6 Launch Octopus
Marooned Tomahawk
This long-lasting weapon spins in place and goes through objects. 12 Armored Armadillo
Bumpity Boom
This powerful leg weapon launches hot napalm, but leaves you open. 2 Napalm Default
Rumbling Bang
This napalm sports a wide horizontal range but cannot attack upward. 12 Spark Mandrill
Splash Hit
This napalm can attack foes above, but has a narrow horizontal range. 8 Launch Octopus
Territorial Pow
Though offensively weak, this napalm destroys some enemy shots. 4 Armored Armadillo
Bang Away Bomb
This napalm travels along the ground, laying a path of fire. 4 Storm Eagle
Deadstar Hug
Unleash balls of energy which bounce once when contacting walls. 4 Ball Armored Armadillo
Peace Out Roller
This ball of energy splits into two upon contact with the ground. 6 Spark Mandrill
Sword Bouquet
Unleash a wave that follows the ground and stops at walls. 16 Flame Mammoth
Hot Icicle
Send destructive energy upward in areas with ceilings. 10 Sting Chameleon
Stubborn Crawler
This energy ball travels over terrain, but uses much energy. 12 Boomerang Kuwanger
Wild Horse Kick
Shoot jets of flame from your leg. Strong, but not energy efficient. 6 Flamethrower Flame Mammoth
Dragon's Wrath
A long-range arcing flamethrower useful against far away enemies. 8 Storm Eagle
Green-Eyed Lamp
Powerful, but with a short range, this weapon consumes much energy. 10 Sting Chameleon
Sea Dragon's Rage
This powerful freezing gas can even be used underwater. 12 Chill Penguin
Burning Drive
Create a powerful ball of flame using nearby oxygen as fuel. 16 Boomerang Kuwanger
Frozen Castle
By utilizing a thin layer of ice, this armor reduces damage by half. Armor Chill Penguin
Speed Devil
A layer of atmospheric pressure adds speed by reducing resistance. Storm Eagle

Stages

Error: Must specify an image in the first line.


Items

Name Sprite Description
Life Energy File:MHX - Life Energy Small.png File:MHX - Life Energy Large.png
Weapon Energy File:MHX - Weapon Energy Small.png File:MHX - Weapon Energy Large.png
1 UP File:MHX - 1 UP (X).png File:MHX - 1 UP (V).png
Ride Armor
File:MHX - Ride Armor.png
Life Up
File:MHX - Life Up.png
Sub Tank
File:MHX - Sub Tank.png
Light Capsule
File:MHX - Light Capsule.png

Armor Parts

People

Relation to other games

External links

References

  1. 1.0 1.1 1.2 1.3 1.4 Game manual, Mega Man Maverick Hunter X. 2005.

This article is a stub. You can help Mega Man Wiki by expanding it.