| Site notice |
|---|
Welcome! Please check To-Do List to see what pages need help, who is working on what, etc.
|
Mega Man X3
| <-- Mega Man X2 | X series | Mega Man X4 --> |
|---|
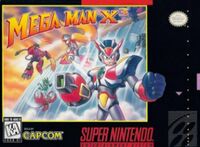
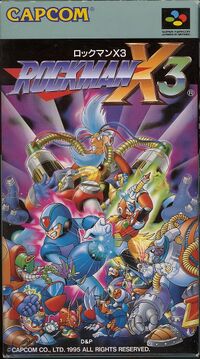
Box Art | |||||||||||
| General information | |||||||||||
|---|---|---|---|---|---|---|---|---|---|---|---|
| Game Title(s): | Mega Man X3, Megaman X3, Rockman X3 | ||||||||||
| Developer(s): | Capcom, Minakuchi Engineering | ||||||||||
| Publisher(s): | Capcom (JP, NA), Laguna Video Games (PAL; SNES), Virgin Interactive (PAL; other) | ||||||||||
| Release Date(s): |
| ||||||||||
| Genre(s): | Action, Platformer | ||||||||||
| Game mode(s): | Single Player | ||||||||||
| Platform(s): | SNES PlayStation Sega Saturn Windows | ||||||||||
Mega Man X3, known as Rockman X3 (ロックマンX3) in Japan, is the third entry in the main X series, released in 1995-1996 on the SNES and ported to the PlayStation, Sega Saturn and Windows at later dates. It is the final X game (though not the final Mega Man game) to be released on the SNES.
The game, developed by Capcom in cooporation with Minakuchi Engineering, sees X go up against a new foe in form of the Reploid scientist Dr. Doppler, with Zero becoming playable for the first time. The 32-bit disc ports (of which only the Windows port was released in North America) add FMV cutscenes and a reworked soundtrack and sound effects, but are otherwise largely identical.
Story
Dr. Doppler, a Reploid scientific genius, has managed to stop viral Maverick infections using an antibody he created. Thanks to this, a utopian city called Dopple Town was built, attracting worldwide attention. However, one day Doppler himself suddenly started a rebellion, with his creations the Nightmare Police following. Furthermore, the Hunter Base comes under attack during X's team's absence, who were resolving incidents elsewhere. What could Doppler's true intentions be?[1]
Characters
| Name | Sprite | Description |
|---|---|---|
| X | The protagonist of the story. He is the captain of the 17th Elite Unit of the Maverick Hunters, who destroy Maverick Reploids that harm humans. However, he is torn between his sense of duty to protect peace and his kindness, which makes him hesitant when destroying Mavericks.[2] | |
| Zero | An SA-Class Maverick Hunter who is a good friend, ally, and friendly rival to X. He once sacrificed himself during a conflict with Sigma and was destroyed, but has made a miraculous recovery and now operates alongside X as the captain of the Special 0 Unit.[2] | |
| Dr. Cain | The greatest authority on robotics in the 22nd century. He developed the Reploids, robots that are as human-like as possible, entirely revolutionizing the field of robotics. He is now the director of the Maverick Hunters, where he provides daily guidance and supports X from behind the scenes.[2] | |
| Dr. Doppler | A Reploid developed to support human scientists. He has created an antibody virus that can eliminate Mavericks. However, his behavior began to change when he started researching a certain computer program. Now, it has come to this...[2] | |
| Bit | The smaller of the Nightmare Police, serving as Dr. Doppler's right-hand-man. His design was based on the most powerful Reploids around the world, emphasizing speed over strength.[3] | |
| Byte | 
|
The larger of the Nightmare Police, serving directly under Dr. Doppler. His design emphasizes strength over speed, and he works well alongside Bit.[3] |
| Vile MK-II | Formerly an SA-Class Hunter in the 17th Elite Unit of the Maverick Hunters, until he rebelled alongside Sigma and was destroyed by X... or so he thought. However, he has returned from hell in a bid to achieve his long-held wish of destroying X in a fit of revenge.[2] | |
| Sigma | 
|
Sigma was once the leader of X's 17th Unit and the most powerful of all Reploids. Twice he has started rebellions to crush humanity and create a world just for Reploids, but each time X has halted his plans and destroyed him. Surely all that is left of him now is burnt scrap under a pile of rubble...[4] |
| Mac | A Maverick Hunter who betrays X, plotting to kidnap him for Dr. Doppler. | |
| Dr. Light | The creator of X, who has left Light Capsules to deliver him Armor Parts years after his own passing. |
Enemies
Minor Enemies
| Name | Sprite | Description | HP | Damage | Stage(s) |
|---|---|---|---|---|---|
| Atareeter | Slowly crawls forward and chews open the ground under it, revealing a trail of small spikes. The spikes remain in the stage permanently, but only deal damage rather than killing X/Zero instantly. | 10 | 8 (contact) 2 (spikes) |
Safari Park Stage | |
| Blady | A wheel that rolls around slowly until it takes damage, then it extends its blades and speeds up. | 6 | 2 | Airborne Aircraft Carrier Stage | |
| Boulder | Starts falling and/or rolling when triggered by X/Zero. If it falls on spikes, it is destroyed instantly. | 10 | 4 | Quarry Stage | |
| Carry Arm | Delivery drones that load Dr. Doppler's airship with crates, which are harmful to touch and must be destroyed. If two crates have been placed, no more Carry Arms appear until one has been destroyed and a Meta Capsule emerges from the ship instead. If Gravity Beetle has been defeated, the ship does not appear and no Carry Arms are present. | 6 (crate) | 2 | Weapons Factory Stage | |
| Caterkiller | Moves up and down on a wall and occasionally charges up two energy shots, which it releases diagonally. The shots fly a certain distance, stop, then return. | 2 | 2 | Hunter Base, Giant Dam Stage, Volt Catfish's stage, Safari Park Stage, Doppler Stage B | |
| Crablaster | Walks on the ceiling or floor and shoots diagonally downward/upward. After losing 3 HP, its cannons break and it can no longer shoot, but periodically creates an electric barrier around it that must be broken through before being able to hit it again. | 4 (Crablaster) 3 (barrier) |
2 (contact) 3 (projectiles) 3 (barrier) |
Volt Catfish's stage, Doppler Stage A, Doppler Stage C | |
| Drill Waying | A stationary enemy that extends upwards and drills into the ceiling, creating an impassable barrier. X/Zero must shoot at its "head" to destroy the barrier, which starts at the top and slowly moves downwards. | 5 | 3 | Quarry Stage, Safari Park Stage, Vile Stage, Doppler Stage A | |
| Drimole-W | Fires its two drills forward individually or lobs bombs in an arc while driving around. The drills deflect shots, and two of them fly out at the same time when the enemy has been destroyed. | 6 | 4 (contact) 2 (drills) 1 (bombs) |
Quarry Stage | |
| Earth Commander | Flies up and down until X/Zero comes near, then flies in semi-circles around them. If the propeller is destroyed first, the core pops out and moves along the ground before exploding. | 3 (ring) 4 (propeller) |
2 (intact) 3 (core) |
Hunter Base, Airborne Aircraft Carrier Stage, Giant Dam Stage, Volt Catfish's stage | |
| Escanail | Slowly crawls up walls. Once its shell has been destroyed, it can be used as a platform. | 3 | 2 | Doppler Stage B, Dr. Doppler stage 2 (Vile) | |
| Ganseki Carrier (boulder) | A version of the Ganseki Carrier that flies in from the side, carrying a boulder. When X/Zero is near, it drops its cargo, then falls down and remains stationary, periodically shooting two consecutive missiles forward. Boulders dropped by Ganseki Carriers break when they hit the ground. | 4 | 4 (contact) 4 (boulder) 2 (missiles) |
Quarry Stage | |
| Ganseki Carrier (ground) | A version of the Ganseki Carrier that starts out on the ground rather than flying, where it remains stationary, periodically shooting two consecutive missiles forward. | 4 | 4 (contact) 2 (missiles) |
Doppler Stage D | |
| Ganseki Carrier (spike ball) | A version of the Ganseki Carrier that carries a large spike ball, which it drops diagonally downward, causing it to bounce between walls. After dropping a spike ball, it flies up and off the screen, then a new Carrier appears with another spike ball. | 4 | 4 (contact) 3 (spike ball) |
Hunter Base | |
| Hamma Hamma | 
|
A stationary robot with spike ball fists that throws first one, then the other in X/Zero's direction. The spike balls hang in midair and deflect shots for a while before being retracted. | 11 | 3 (contact) 2 (spike balls) |
Shipyard Stage, Safari Park Stage, Vile Stage, Doppler Stage A, Dr. Doppler stage 2 (Vile) |
| Hangerter | A floating machine that can immobilise a robot under it. It is harmless to touch and can be destroyed to release whatever it is holding. | 2 | N/A | Hunter Base, Weapons Factory Stage | |
| Head Gunner customer | A stationary enemy that shoots two consecutive missiles forward, which slightly home in on X/Zero, or lobs three bombs in an arc. All Head Gunner customers in the main Maverick stages (but not in Dr. Doppler's fortress) are replaced with Head Gunner masspros after Blast Hornet has been defeated. | 6 (Head Gunner) 1 (projectiles) |
6 (contact) 1 (projectiles) |
Hunter Base, Weapons Factory Stage, Airborne Aircraft Carrier Stage, Giant Dam Stage, Volt Catfish's stage, Doppler Stage A | |
| Head Gunner masspro | A reploid suspended from an energy beam. If X shoots the beam or moves too close, the reploid will drop and jump around. X can also destroy its body while it is hanging, leaving a head that spits projectiles and will not drop by itself. | 4 (Head Gunner) 1 (projectiles) |
4 (contact) 1 (missiles) |
Weapons Factory Stage, Airborne Aircraft Carrier Stage, Giant Dam Stage, Volt Catfish's stage | |
| Helit | Follows X/Zero on the vertical axis and shoots missiles forward when at the same height, which can be destroyed. After shooting two missiles, it flies up and disappears. | 2 (Helit) 2 (missiles) |
2 (contact) 3 (missiles) |
Weapons Factory Stage, Frozen Town Stage, Shipyard Stage, Doppler Stage B, Dr. Doppler stage 2 (Vile) | |
| Ice De Voux | A robotic core encased in ice that drops down and bounces around. When its shell is destroyed, the core stops in midair and will magnetise new ice fragments to it if it is not destroyed quickly. | 3 (shell) 3 (core) |
6 (shell) 2 (core) 2 (debris) |
Frozen Town Stage | |
| Iwan De Voux | A robotic core encased in rock that drops down and bounces around. When its shell is destroyed, the core stops in midair and will magnetise new rock fragments to it if it is not destroyed quickly. | 3 (shell) 3 (core) |
6 (shell) 2 (core) 2 (debris) |
Quarry Stage | |
| Meta Capsule | Periodically opens to charge up a shot and fire it at X/Zero. The shot splits in two and briefly travels along walls after colliding with something solid. Can only be harmed while it is open. | 2 | 2 (contact) 2 (projectiles) |
Volt Catfish's stage, Safari Park Stage, Doppler Stage A | |
| Mine Tortoise | Slowly sinks in water or swims at X/Zero in bursts. Once destroyed, the invincible shell floats up to the water surface or explodes if it touches a ceiling. | 3 | 2 | Giant Dam Stage, Doppler Stage B | |
| Notor Banger | Aims the cannon on its back to shoot three consecutive projectiles at X/Zero in an arc, then jumps and repeats. Its projectiles can be destroyed. | 3 (Notor Banger) 1 (projectiles) |
2 (contact) 2 (projectiles) |
Hunter Base, Weapons Factory Stage, Frozen Town Stage, Airborne Aircraft Carrier Stage, Giant Dam Stage, Safari Park Stage, Vile Stage, Dr. Doppler stage 2 (Vile) | |
| Snow Rider | A stationary robot that periodically shoots a laser forward. | 3 | 3 (contact) 2 (laser) |
Frozen Town Stage | |
| Snow Slider | A Snow Rider in a sled. It speeds along the ground and flings ice cubes from its rear, which freeze X/Zero in place until they take damage. The player can also free them by rapidly mashing buttons. When the Snow Slider is destroyed, the Snow Rider pops out. | 3 | 3 | Frozen Town Stage | |
| Spark | Travels up and down along cables and cannot be destroyed. | N/A | 2 | Volt Catfish's stage | |
| Spike ball | Large, indestructible spike balls that fall down quickly and bounce off walls. They may fall out of chutes or be dropped by Ganseki Carriers. | N/A | 3 | Hunter Base, Doppler Stage A | |
| Spycopter | 
|
Large, bee-like helicopters. They only appear in the intro (where one is destroyed by X and Zero) and as background details, but are listed as enemies in the ending. | N/A | N/A | Hunter Base |
| Tombort | A dragonfly that flies back and forth or swoops down, stopping at the end of its path. It is mostly harmless and can be used as a platform, though it may fire three smalls bombs from its tail whenever X/Zero shoots. | 6 | 2 (projectiles) | Safari Park Stage | |
| Trapper | An indestructible device that creates a laser beam below it, which sways back and forth and turns into harmful energy when X/Zero touches it. The beam periodically deactivates, but can also be passed without taking damage by moving quickly enough. | N/A | 1 | Volt Catfish's stage, Doppler Stage C | |
| Victoroid | 
|
A mostly stationary robot that occasionally fires a laser straight forward, alternating between high and low shots. It will try to jump over the first charge shot fired. | 10 | 8 (contact) 4 (laser) |
Giant Dam Stage |
| Victoroid customer | 
|
An upgraded Victoroid that shoots faster and can additionally lob small bombs from its back. Once 4 of its HP have been depleted, its armour falls off and it behaves like a regular Victoroid. | 14 | 8 (contact) 4 (laser) 6 (bombs) |
Doppler Stage B |
| Walk Blaster | A walking gun that can crouch while firing and will frequently do so to avoid X/Zero's shots. | 5 | 3 (contact) 1 (laser) |
Shipyard Stage, Doppler Stage A, Doppler Stage B, Doppler Stage C, Doppler Stage D | |
| Wall Cancer | A crab that walks up and down on walls and occasionally charges up two shots, which it either fires up and down or forward. If X/Zero is charging or has a charge shot stored, it charges up bigger shots and always throws them forward. | 4 | 2 (contact) 4 (projectiles) 8 (charge shot) |
Airborne Aircraft Carrier Stage, Shipyard Stage, Quarry Stage, Vile Stage, Dr. Doppler stage 2 (Vile), Doppler Stage C | |
| Wild Tank | Tosses spikes in an arc, which get stuck in the ground and can be destroyed. After it has thrown three spikes, it charges forward, detonating the spikes. Destroying the Wild Tank also removes any stuck spikes. | 6 (Wild Tank) 2 (spikes) |
4 (contact) 2 (spikes) |
Safari Park Stage |
Mid-bosses
Occasionally, X may encounter very powerful enemies throughout the stages, which are located behind boss doors and prevent him from progressing until they are defeated. As Zero normally will not pass through these doors, most minibosses cannot be fought as him, with the exception of Mac (who is fought at a point when the player can only control Zero) and Mosquitus.
| Name | Sprite | Description | HP | Damage | Stage(s) |
|---|---|---|---|---|---|
| Hell Crusher | 
|
Drives forward and rams the wall, which causes X to fall down if he is climbing on it. It may also separate its torso from its base, attaching the former to the ceiling and launching a claw forward while the base continues to ram. X can stand on the separated base, though its sides will still hurt him. Only the Hell Crusher's torso can be damaged. | 32 | 2 (contact) 3 (claw) |
Quarry Stage |
| Hotareeca | 
|
A robotic jellyfish that moves around and fires three successive torpedoes in an arc, or disperses six mines one by one, which sink and explode. Despite flailing around, its arms cannot hurt X. | 32 | 2 (contact) 2 (torpedoes) 3 (mines) |
Giant Dam Stage |
| Mac | Occasionally jumps up or across the room, firing many small projectiles at Zero or a single larger one, which deals the same amount of damage. | 16 | 2 (contact) 2 (projectiles) |
Hunter Base | |
| Mosquitus | 
|
Flies left and right and occasionally dives down at X/Zero. If it misses, it will instead drink from one of the coloured buckets on the floor, becoming that colour, or drain its current colour into that bucket if it is already coloured. By mixing different colours, lasting hazards are created on the ground:
Unlike other minibosses, Mosquitus can be fought by Zero, which leads to a cutscene that ends in the loss of Zero and X obtaining his Z-Saber. |
16 | 8 (contact) 2 (slime) 4 (other hazards) |
Doppler Stage B |
| REX-2000 | 
|
Walks back and forth, occasionally opening its mouth to fire many projectiles forward while releasing homing missiles, which can be destroyed. During the fight, the ceiling is collapsing; if Zero is alive, he will slow its collapse and stop it when the REX-2000 is destroyed. Otherwise, it collapses faster and a switch must be destroyed to stop it. | 11 (REX-2000) 2 (missiles) |
8 (contact) 4 (missiles) 2 (projectiles) |
Doppler Stage A |
| Shurikein and Genjibo | A holographic star created by the robot insect Genjibo. It alternates between two patterns, either rolling left and right very fast and jumping when shot at, or scaling the walls and ceiling more slowly. It pauses when changing patterns. | 18 | 3 | Weapons Factory Stage | |
| Worm Seeker-R | 
|
A segmented worm that emerges from and disappears into the ceiling, walls and floor in various patterns, dropping two small spike balls, which bounce at different heights and disappear after a while or when shot at a few times. Only its head can be damaged. | 22 | 4 (contact) 2 (spike balls) |
Safari Park Stage |
Bit & Byte and Vile
After the 2nd main Maverick has been defeated, Bit, Byte and Vile MK-II spread out and can be encountered as minibosses in the Maverick stages. Bit, and later Byte, will appear in a designated room in a random stage and cannot be avoided, whereas Vile appears in his own sub-stage to be accessed via hidden teleporter, which can appear either in Volt Catfish's, Crush Crawfish's or Blizzard Buffalo's stage.
Using a weakness to land the final hit on any of these minibosses triggers their destruction and can prevent them from reappearing in upgraded boss forms in Dr. Doppler's fortress: If both Bit and Byte have been destroyed, the Godkarmachine O Inary boss is replaced with the Press Disposer, while Vile's destruction leads to the Goliath boss being replaced with Volt Kurageil, as well as Dr. Doppler stage 2 being drastically altered.
| Name | Sprite | Description | Stage(s) | Weakness |
|---|---|---|---|---|
| Bit | Any Maverick stage | Frost Shield | ||
| Triad Thunder | ||||
| Byte | 
|
Any Maverick stage | Tornado Fang | |
| Ray Splasher | ||||
| Vile MK-II (DRA-00) | 
|
Vile Stage | Spinning Blade | |
| Ray Splasher | ||||
| Vile MK-II | Vile Stage | Spinning Blade | ||
| Ray Splasher |
Bosses
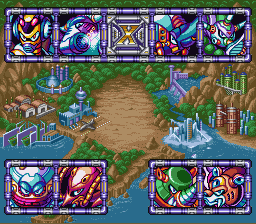
Main Mavericks
Other Bosses
| Name | Sprite | Description | Stage | Weakness |
|---|---|---|---|---|
| Maoh the Giant | 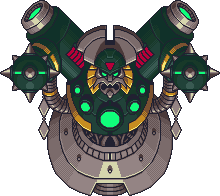
|
Hunter Base | N/A | |
| Press Disposer | 
|
This boss is only fought if both Bit and Byte were destroyed with a weakness in their miniboss fights; otherwise, Godkarmachine O Inary will replace it. | Doppler Stage A | Ray Splasher |
| Tornado Fang | ||||
| Godkarmachine O Inary | 
|
This boss is only fought if either Bit or Byte was *not* destroyed with a weakness in his miniboss fight; otherwise, the Press Disposer will replace it. | Doppler Stage A | Ray Splasher |
| Volt Kurageil | 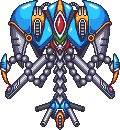
|
This boss is only fought if Vile was destroyed with a weakness in Vile Stage; otherwise, the Goliath will replace it. | Doppler Stage B | Frost Shield |
| Triad Thunder | ||||
| Goliath | 
|
A powerful Ride Armor piloted by Vile. The fight is very similar to Vile Mk-II's first phase in his own stage, but the arena is wider and the boss will create temporary walls that X can climb on. This boss is only fought if Vile was *not* destroyed with a weakness in his own stage; otherwise, Volt Kurageil will replace it. |
Doppler Stage B | Parasitic Bomb |
| Tornado Fang | ||||
| Dr. Doppler | Doppler Stage C | Acid Burst | ||
| Sigma | 
|
Doppler Stage D | Frost Shield | |
| Spinning Blade | ||||
| Kaiser Sigma | 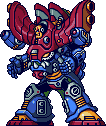
|
Sigma's second form can only be harmed with charged X-Buster shots (or the Z-Saber if it has been unlocked). | Doppler Stage D | X-Buster (charged) |
| Sigma Virus | Sigma's true form floats upwards through a vertical shaft and causes lava to rise up from the bottom. It cannot be harmed and must simply be chased to the top, though it will try to ram into X to make him fall into the lava. | Doppler Stage D | N/A |
Weapons
By default, X wields the X-Buster. He can then collect Special Weapon(Which one?)s by defeating the eight Maverick bosses, each with its own elemental alignment and properties. There are also two secret weapons: the Beam Saber and the Hyper Charge.
When playing as Zero, he uses his Z-Buster, performing similarly to X with the Arm Parts. He also wields the Beam Saber, though it does not emit a projectile, and he cannot use any Special Weapons.
| Name | Icon | Description | Source |
|---|---|---|---|
| X-Buster | X's default weapon. It fires up to three shots horizontally, and can be charged up for a Charge Shot of two levels. Collecting the Arm Parts unlocks a third and fourth Charge Shot level. | Default | |
| Beam Saber | Slashes once to fire a cutter projectile, as part of a Charge Shot 4. | Zero injured by Mosquitus | |
| Acid Burst | Fires acid that splashes into droplets on surfaces. Can be aimed up or down. Charge Shot fires two acid blobs that bounce towards enemies. |
Toxic Seahorse | |
| Parasitic Bomb | Fires a mine that attaches to enemies; large enemies are stunned, whereas small enemies are carried by it to smash into other enemies. Charge Shot projects four crosshairs around X, which lock onto enemies and send bees after them. |
Blast Hornet | |
| Triad Thunder | Fires three dynamos in a triangle around X, which pass electricity before shooting outwards. Continuously firing prolongs the shot up to three times. Charge Shot has X punch the ground, emitting two balls of electricity. Destroys some objects. |
Volt Catfish | |
| Spinning Blade | Fires two flying saw blades that return backwards in arcs. Charge Shot fires a giant saw blade on a tether, which can be rotated around X. |
Crush Crawfish | |
| Ray Splasher | Fires seven light bullets in random trajectories. Charge Shot fires an orb upwards, which rapidly shoots light bullets in random directions. |
Neon Tiger | |
| Gravity Well | Fires a gravity drone that crushes nearby small or medium enemies. Charge Shot fires a gravity drone upwards off-screen, which causes low gravity that disposes of all enemies and can move certain platforms. |
Gravity Beetle | |
| Frost Shield | Fires an icicle that pauses before moving. On contact, it shatters and becomes a spike on the floor. Charge Shot sculpts an ice shield on the X-Buster, which eventually shatters into an ice spike that slides along the ground. If used underwater, it becomes a platform that rises to the surface. |
Blizzard Buffalo | |
| Tornado Fang | Fires a drill that pauses before moving. Up to three can be stacked. Can destroy some obstacles. Charge Shot extends a drill while the button is held, which destroys enemies and can grab walls. |
Tunnel Rhino | |
| Hyper Charge | Grants max X-Buster Charge Shots as long as it has Weapon Energy, which is consumed every shot. | Arm Chip |
Stages
- Opening Stage: Hunter Base
- Weapons Factory Stage
- Frozen Town Stage
- Airborne Aircraft Carrier Stage
- Giant Dam Stage
- Power Control Center Stage
- Shipyard Stage
- Quarry Stage
- Safari Park Stage
- Vile Stage (optional)
- Last Stages:
Items
| Name | Sprite | Description |
|---|---|---|
| Life Energy | Small units restore 2 points of Life Energy. Large units restore 8 points of Life Energy. | |
| Weapon Energy | Small units restore 2 points of Weapon Energy. Large units restore 8 points of Weapon Energy. | |
| 1 UP | Grants an extra life. (sprite reused from Mega Man X) | |
| Ride Armor |  |
In a Ride Armor, the player takes no damage and can use powerful new attacks. Once unlocked in Weapons Factory Stage, they can be summoned from any Ride Armor Platform. |
| Life Up | Permanently increases maximum Life Energy by 2 points. (sprite reused from Mega Man X) | |
| Sub Tank | Grants a reserve tank which can be filled by Life Energy pickups and used later. (sprite reused from Mega Man X) | |
| Light Capsule | Blue Light Capsules grant Armor Parts, which apply a permanent upgrade to X's abilities. Red Light Capsules grant Chips, which can be equipped one at a time for extra effects. | |
| Change Parts | Unlocks a new customization for the Ride Armor. |
Armor Parts
People
Related Media
Games
- Rockman X3 Buster Battle: A game on Bandai's Denshi Manga Juku featuring bosses from Mega Man X3.
- Rockman X Math Cyclone: A licensed educational game featuring bosses from Mega Man X3.
- Mega Man Xtreme 2: Replicates aspects from Mega Man X3, including the bosses Neon Tiger, Volt Catfish, Blast Hornet, and Tunnel Rhino.
- Marvel vs. Capcom: Infinite: X gets Frost Shield from here.
Ports, Remakes and Compilations
- Mega Man X Collection: Includes a port of the Sega Saturn version of Mega Man X3.
- Mega Man X Legacy Collection: Includes a port of the SNES version of Mega Man X3.
Strategy Guides
- Compendium of Rockman X (Japanese)
- Rockman X3 Super Famicom Hisshō-hō Special (Japanese)
- Comic BomBom Special #99: Ketteiban - Rockman 7 & Rockman X3 Chōhyakka (Japanese)
- Haoh Game Special #56: Rockman X3 (Kaitei Shinpan) Kōryaku Shirei File (Japanese)
- Kanpeki Kōryaku #123: Rockman X3 Hisshō Kōryakuhō (Japanese)
- Rockman X3 Kanzen Kōryaku Hon (Japanese)
- Rockman X3 Kanzen Kōryaku Hon: PlayStation / Saturn Ryō Taiōban (Japanese)
Adaptations
- Rockman X3: Manga by Iwamoto Yoshihiro.
External Links
References
- ↑ Mega Man X3, Compendium of Rockman X. 2005.
- ↑ Jump up to: 2.0 2.1 2.2 2.3 2.4 Game manual, Mega Man X3. PlayStation. 1996.
- ↑ Jump up to: 3.0 3.1 Compendium of Rockman X. 2005.
- ↑ Gallery, Mega Man X Legacy Collection. 2018.
This article is a stub. You can help Mega Man Wiki by expanding it.
