| Site notice |
|---|
Welcome! Please check To-Do List to see what pages need help, who is working on what, etc.
|
Difference between revisions of "Mega Man 7"
From Mega Man Wiki
Vellidragon (talk | contribs) (→Enemies: Templating the boss info, fixing enemy names. Some of these weapon cell colours are hideous...) |
|||
| Line 95: | Line 95: | ||
| | | | ||
|- | |- | ||
| [[Bunby Tank]] | | [[Boufooh]] | ||
| style="text-align:center" | [[File:MM7 - Boufooh.png]] | |||
| | |||
|- | |||
| [[Bunby Tank]] / Bunby Top | |||
| style="text-align:center" | [[File:MM7 - Bunby Tank.png]] | | style="text-align:center" | [[File:MM7 - Bunby Tank.png]] | ||
| | | | ||
| Line 103: | Line 107: | ||
| | | | ||
|- | |- | ||
| [[ | | [[Coil'n]] | ||
| style="text-align:center" | [[File:MM7 - | | style="text-align:center" | [[File:MM7 - Coil'n.png]] | ||
| | |||
|- | |||
| [[Count Bomb Neo]] | |||
| style="text-align:center" | [[File:MM7 - Count Bomb Neo.png]] | |||
| | | | ||
|- | |- | ||
| Line 111: | Line 119: | ||
| | | | ||
|- | |- | ||
| [[ | | [[DeluPipi]] | ||
| style="text-align:center" | [[File:MM7 - | | style="text-align:center" | [[File:MM7 - DeluPipi.png]] | ||
| | |||
|- | |||
| [[Derusu Bee]] | |||
| style="text-align:center" | [[File:MM7 - Derusu Bee.png]] | |||
| | | | ||
|- | |- | ||
| Line 119: | Line 131: | ||
| | | | ||
|- | |- | ||
| [[Dust | | [[Dust Crusher (enemy)|Dust Crusher]] | ||
| style="text-align:center" | [[File:MM7 - Dust Crusher.png]] | |||
| style="text-align:center" | [[File:MM7 - | |||
| | | | ||
|- | |- | ||
| [[Frisk Cannon]] | | [[Frisk Cannon]] | ||
| style="text-align:center" | [[File:MM7 - Frisk Cannon.png]] | | style="text-align:center" | [[File:MM7 - Frisk Cannon.png]] | ||
| | | | ||
|- | |- | ||
| Line 147: | Line 147: | ||
| | | | ||
|- | |- | ||
| [[ | | [[Gockroach Nest]] | ||
| style="text-align:center" | [[File:MM7 - | | style="text-align:center" | [[File:MM7 - Gockroach Nest.png]] | ||
| | | | ||
|- | |- | ||
| [[ | | [[Gockroach S]] | ||
| style="text-align:center" | [[File:MM7 - | | style="text-align:center" | [[File:MM7 - Gockroach S.png]] | ||
| | | | ||
|- | |- | ||
| Line 163: | Line 163: | ||
| | | | ||
|- | |- | ||
| [[ | | [[Kaminari Kogoro]] | ||
| style="text-align:center" | [[File:MM7 - | | style="text-align:center" | [[File:MM7 - Kaminari Kogoro.png]] | ||
| | |||
|- | |||
| [[Kerone]] | |||
| style="text-align:center" | [[File:MM7 - Kerone.png]] | |||
| | |||
|- | |||
| [[Kintot]] | |||
| style="text-align:center" | [[File:MM7 - Kintot.png]] | |||
| | | | ||
|- | |- | ||
| [[Metall | | [[Metall FX]] | ||
| style="text-align:center" | [[File:MM7 - Metall | | style="text-align:center" | [[File:MM7 - Metall FX.png]] | ||
| | | | ||
|- | |- | ||
| Line 175: | Line 183: | ||
| | | | ||
|- | |- | ||
| [[ | | [[Properide]] | ||
| style="text-align:center" | [[File:MM7 - | | style="text-align:center" | [[File:MM7 - Properide.png]] | ||
| | | | ||
|- | |- | ||
| Line 183: | Line 191: | ||
| | | | ||
|- | |- | ||
| [[ | | [[Shirokumachine GTV]] | ||
| style="text-align:center" | [[File:MM7 - | | style="text-align:center" | [[File:MM7 - Shirokumachine GTV.png]] | ||
| | | | ||
|- | |- | ||
| [[ | | [[Sisi Truck|Sisi Rocket]] | ||
| style="text-align:center" | [[File:MM7 - | | style="text-align:center" | [[File:MM7 - Sisi Rocket.png]] | ||
| | | | ||
|- | |- | ||
| [[Sniper Joe]] | | [[Sniper Joe 01]] | ||
| style="text-align:center" | [[File:MM7 - Sniper Joe.png]] | | style="text-align:center" | [[File:MM7 - Sniper Joe 01.png]] | ||
| | |||
|- | |||
| [[Spiral Gabyoall]] | |||
| style="text-align:center" | [[File:MM7 - Spiral Gabyoall.png]] | |||
| | | | ||
|- | |- | ||
| Line 199: | Line 211: | ||
| | | | ||
|- | |- | ||
| [[ | | [[Swim Metall DX]] | ||
| style="text-align:center" | [[File:MM7 - | | style="text-align:center" | [[File:MM7 - Swim Metall DX.png]] | ||
| | |||
|- | |||
| [[Tamagodon]] | |||
| style="text-align:center" | [[File:MM7 - Tamagodon.png]] | |||
| | |||
|- | |||
| [[Tel Tel]] | |||
| style="text-align:center" | [[File:MM7 - Tel Tel.png]] | |||
| | | | ||
|- | |- | ||
| Line 207: | Line 227: | ||
| | | | ||
|- | |- | ||
| [[Trio | | [[Trio The Wheel]] | ||
| style="text-align:center" | [[File:MM7 - Trio | | style="text-align:center" | [[File:MM7 - Trio The Wheel.png]] | ||
| | | | ||
|- | |- | ||
| Line 215: | Line 235: | ||
| | | | ||
|- | |- | ||
| [[ | | [[True Shield Attacker]] | ||
| style="text-align:center" | [[File:MM7 - | | style="text-align:center" | [[File:MM7 - True Shield Attacker.png]] | ||
| | | | ||
|- | |- | ||
| [[ | | [[Tsuranattori]] | ||
| style="text-align:center" | [[File:MM7 - | | style="text-align:center" | [[File:MM7 - Tsuranattori.png]] | ||
| | | | ||
|- | |- | ||
| [[ | | [[Turbo Roader]] | ||
| style="text-align:center" | [[File:MM7 - | | style="text-align:center" | [[File:MM7 - Turbo Roader.png]] | ||
| | | | ||
|} | |} | ||
=== | === Minibosses === | ||
{| class="wikitable" style="width:100%;" | {| class="wikitable" style="width:100%;" | ||
|- | |- | ||
| Line 236: | Line 255: | ||
! Description | ! Description | ||
! Weakness | ! Weakness | ||
|- | |||
| [[Bass]] | |||
| style="text-align:center" | [[File:MM7 - Bass.png]] | |||
| | |||
| Super Adapter | |||
|- | |||
| [[Kanigance]] | |||
| style="text-align:center" | [[File:MM7 - Kanigance.png]] | |||
| | |||
| | |||
|- | |- | ||
| [[King Gojulus]] | | [[King Gojulus]] | ||
| Line 246: | Line 275: | ||
| | | | ||
| Mega Buster | | Mega Buster | ||
|- | |- | ||
| [[Sisi Truck]] | | [[Sisi Truck]] | ||
| Line 256: | Line 280: | ||
| | | | ||
| Thunder Bolt | | Thunder Bolt | ||
|- | |||
| [[Super Bass]] | |||
| style="text-align:center" | [[File:MM7 - Super Bass.png]] | |||
| | |||
| style="background-color:#ffffff; color:#000000" | Super Adapter | |||
|- | |- | ||
| [[Truck Joe]] | | [[Truck Joe]] | ||
| Line 266: | Line 295: | ||
| | | | ||
| Thunder Bolt | | Thunder Bolt | ||
|} | |} | ||
=== Robot Masters === | === Robot Masters === | ||
Robot masters in this game are fought in two batches, with the second batch of Robot Master stages becoming available after beating all the bosses from the first batch and the [[Robot Museum]] intermission stage. | |||
====First Batch==== | |||
| | {{Boss table|Robot Masters}} | ||
{{Boss table/MM7|Freeze Man}} | |||
|- | |- | ||
| | {{Boss table/MM7|Cloud Man}} | ||
|- | |- | ||
{{Boss table/MM7|Junk Man}} | |||
|- | |- | ||
| | {{Boss table/MM7|Burst Man}} | ||
| | |} | ||
====Second Batch==== | |||
| | {{Boss table|Robot Masters}} | ||
{{Boss table/MM7|Spring Man}} | |||
|- | |- | ||
| | {{Boss table/MM7|Slash Man}} | ||
|- | |- | ||
{{Boss table/MM7|Turbo Man}} | |||
| | |||
|- | |- | ||
{{Boss table/MM7|Shade Man}} | |||
|} | |} | ||
=== | === Other Bosses === | ||
{ | {{Boss table}} | ||
{{Boss table/MM7|Bass}} | |||
| | |||
|- | |- | ||
{{Boss table/MM7|Mash}} | |||
|} | |} | ||
=== | ==== Dr. Wily's fortress ==== | ||
{{Boss table}} | |||
{{Boss table/MM7|Guts Man G}} | |||
| | |||
|- | |- | ||
{{Boss table/MM7|Gamerizer}} | |||
| | |||
|- | |- | ||
{{Boss table/MM7|Hanny NED²}} | |||
| | |||
|- | |- | ||
{{Boss table/MM7|Wily Machine 7}} | |||
| | |||
|- | |- | ||
{{Boss table/MM7|Wily Capsule}} | |||
|} | |} | ||
Revision as of 22:09, 12 June 2021
| <-- Mega Man 6 | Main series | Mega Man 8 --> |
|---|
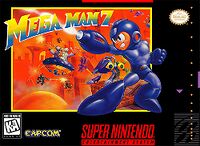
| File:MM7 - Box Art.png Box Art | |
| General information | |
|---|---|
| Game Title(s): | Mega Man 7 |
| Developer(s): | Capcom |
| Publisher(s): | Capcom, Nintendo |
| Genre(s): | Action, Platformer |
| Game mode(s): | Single Player |
| Platform(s): | Super Nintendo Entertainment System |
Characters
| Name | Sprite | Description |
|---|---|---|
| Mega Man | ||
| Rush | ||
| Bass | ||
| Treble | ||
| Dr. Light | ||
| Dr. Wily | ||
| Proto Man | ||
| Roll | ||
| Auto | ||
| Beat | ||
| Eddie | ||
| Reggae |
Enemies
Minor Enemies
Minibosses
| Name | Sprite | Description | Weakness |
|---|---|---|---|
| Bass | Super Adapter | ||
| Kanigance | 
|
||
| King Gojulus | 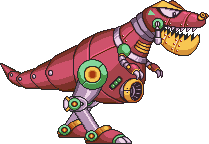
|
Junk Shield | |
| Mad Grinder | 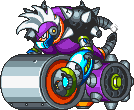
|
Mega Buster | |
| Sisi Truck | 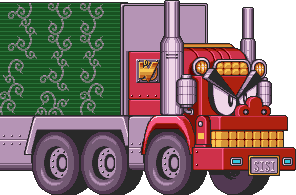
|
Thunder Bolt | |
| Super Bass | 
|
Super Adapter | |
| Truck Joe | 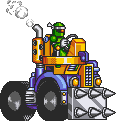
|
Noise Crush | |
| Van Pookin | 
|
Thunder Bolt |
Robot Masters
Robot masters in this game are fought in two batches, with the second batch of Robot Master stages becoming available after beating all the bosses from the first batch and the Robot Museum intermission stage.
First Batch
| Name | Sprite | Description | Stage | Weapon | Weakness |
|---|---|---|---|---|---|
| Freeze Man | 
|
Attacks with a variety of ice-based attacks while running across the room. He jumps when Mega Man shoots, making it possible to walk under him. | Iceberg Area Stage | Freeze Cracker | Junk Shield |
| Scorch Wheel | |||||
| Cloud Man | 
|
Weather Institute Stage | Thunder Bolt | Danger Wrap | |
| Junk Man | 
|
Recycling Plant Stage | Junk Shield | Thunder Bolt | |
| Burst Man | 
|
Chemical Factory Stage | Danger Wrap | Scorch Wheel |
Second Batch
| Name | Sprite | Description | Stage | Weapon | Weakness |
|---|---|---|---|---|---|
| Spring Man | Theme Park Stage | Wild Coil | Slash Claw | ||
| Slash Man | Jungle Stage | Slash Claw | Freeze Cracker | ||
| Scorch Wheel | |||||
| Turbo Man | 
|
Giant Trailer Stage | Scorch Wheel | Noise Crush | |
| Shade Man | 
|
Old Castle Stage | Noise Crush | Wild Coil |
Other Bosses
| Name | Sprite | Description | Stage | Weakness |
|---|---|---|---|---|
| Bass | Bass is fought at the end of the opening stage, where he jumps up and down while rapidly firing shots from his arm cannon. Mega Man cannot lose this fight; it ends when either he or Bass has taken enough damage, though the outcome slightly changes the resulting cutscene. | Urban Area Stage | N/A | |
| Mash | 
|
A jester robot that Dr. Wily leaves behind to delay Mega Man in the Robot Museum. He jumps around and can only be damaged by attacking his head at the right time, which may cause it to pop off and bounce around, posing an additional danger until Mash picks it up and puts it back on. | Robot Museum Stage | Danger Wrap |
Dr. Wily's fortress
| Name | Sprite | Description | Stage | Weakness |
|---|---|---|---|---|
| Guts Man G | 
|
Wily Castle Stage 1 | Slash Claw | |
| Gamerizer | 
|
Wily Castle Stage 2 | Wild Coil | |
| Danger Wrap | ||||
| Wily Machine 7 | 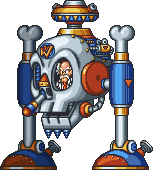
|
Wily Castle Stage 4 | Thunder Bolt | |
| Wily Capsule | 
|
Wily Castle Stage 4 | Wild Coil |
Weapons
| Name | Sprite | Description |
|---|---|---|
| Mega Buster | ||
| Danger Wrap | ||
| Freeze Cracker | ||
| Junk Shield | 
|
|
| Scorch Wheel | ||
| Noise Crush | ||
| Slash Claw | ||
| Thunder Bolt | ||
| Wild Coil |
Rush Transformations
| Name | Sprite | Description |
|---|---|---|
| Rush Coil | File:MM7 - Rush Mega Man.png |
|
| Rush Jet | File:MM7 - Rush Mega Man.png |
|
| Rush Search | File:MM7 - Rush Mega Man.png |
Stages
Items
People
Relation to other Games
Classic era
- Ports, Remakes and Compilations:
Mega Man Legacy Collection 2
| Name | Time Limit | Unlock condition | Related Games |
|---|---|---|---|
| Stage Remix 1 | 09:00:00 | Open at the start | Mega Man 7 |
| Stage Remix 2 | Mega Man 7 | ||
| Sub-Boss Rush | Mega Man 7 | ||
| Boss Rush | Mega Man 7 | ||
| Guts Man G | Mega Man 7 | ||
| Gasmerizer | Mega Man 7 | ||
| Hannya NED² | Mega Man 7 | ||
| Wily Machine 7 | Mega Man 7 | ||
| Sub-Boss Rush | Mega Man 7 | ||
| Boss Rush | Mega Man 7 |
| Icon | Title | Unlocked by | Related Games |
|---|---|---|---|

|
The Fateful Showdown! | Prove yourself stronger than Bass and complete Mega Man 7. | Mega Man 7 |

|
Bring Them All On! | Complete the "BOSS RUSH" challenge (Mega Man 7). | Mega Man 7 |
Super Smash Bros. series
| Name | Source Game | Weapon | Assist Trophy | Smash Tour Item | Boss | Stage | Mii Costume | Enemy | Trophy | Spirit | Music |
|---|---|---|---|---|---|---|---|---|---|---|---|
| Bass | Mega Man 3, Mega Man 7 and Mega Man 10 | Mega Legends - part of Mega Man's Final Smash | N/A | N/A | N/A | N/A | N/A | N/A | File:SSBU - Bass and Treble.png | 866 - File:SSBU - Bass.png | N/A |
| Burst Man | Mega Man 7 | Danger Wrap, Mega Man's Custom side special l | N/A | N/A | N/A | N/A | N/A | N/A | N/A | N/A | N/A |
| Mega Man (Classic era) | Mega Man, Mega Man 2, Mega Man 3, Mega Man 4, Mega Man 5, Mega Man 6, Mega Man 7, Mega Man 8, Mega Man 9, Mega Man 10, Super Adventure Rockman, Mega Man 2: The Power Fighters | Mega Buster | N/A | N/A | N/A | N/A | N/A | N/A | N/A | 864 - File:SSBU - Mega Man.png | N/A |
| Treble | Mega Man 7 | Mega Legends - part of Mega Man's Final Smash | N/A | N/A | N/A | N/A | N/A | N/A | File:SSB4 - Bass and Treble.png | N/A | N/A |
| Slash Man | Mega Man 7 | Slash Claw, Mega Man's Back aerial | N/A | N/A | N/A | N/A | N/A | N/A | N/A | 902 - 
|
N/A |
Super Smash Bros. 4
Super Smash Bros. Ultimate
External Links
This article is a stub. You can help Mega Man Wiki by expanding it.


